Skip to content
Free shippingorders over 120€
English
English
Français
Deutsch
  • Shop Needlepoint Kits
    • Shop All Kits & Canvases
    • Bestsellers
    • New In
    • Beginner Kits
    • Starter Kits (all tools inc)
    • Shop by Skill Level and Size
      • for Kids
      • Starter Kits (all tools inc)
      • Beginner
      • Confident Beginner
      • Intermediate
      • Advanced
      • Extra Small
      • Small
      • Medium
      • Large
    • Shop by Category
      • Bookmarks
      • Key Fobs
      • Bag Charms & Patches
      • Portuguese Tiles
      • Starter Kits
      • Sunglasses Cases
      • Coasters & Trays
      • Clutches & Inserts
      • Cushion Kits
      • Ornaments
      • Christmas Products
      • for Kids
      • Long Stitch Kits
      • Digital Charts
      • Magnets
    • Shop by Style
      • Summer Love
      • Floral Garden
      • Folk Art
      • Nature Elements
      • Bold and Colorful
      • Geometric Designs
      • Abstract Visuals
      • Minimal Aesthetic
      • Museum Art
      • Cozy Fall
      • Mental Health Crafts
    • Shop by Theme
      • for Children
      • Animals
      • Flowers
      • Landscapes
      • Tumbling Blocks
      • Museum Art
      • Sayings
      • Portugal
      • Food
      • Christmas
      • Travel
      • Nursery Decor
    • Digital Charts
    • Canvas Sets
    • Sale
      • 25% Off Sale
      • Bundle & Save 10%
  • Accessories
    • Shop All
    • Unwind Studio Frames
    • Acrylic Trays & Coasters
    • Decorative Stitches Booklet
    • Project Bags
    • Needle Minders
    • Embroidery Scissors
    • Blank Canvas
    • Lifestyle Items
  • Finishing Shop
    • Browse our Finishing Guide
    • Shop Frames
    • Shop Supplies by Project
    • Shop All Finishing Tools & Materials
  • Gifts
    • Mother's Day Gift Guide ✨
    • Browse our Gift Guide
    • Gift Boxes
    • Greeting Cards & Gift Tags
    • Gift by Recipient
      • Gifts for Beginners
      • Gifts for Crafters & Makers
      • Gifts for Teenagers
      • Gifts for Kids
      • Gifts for Sisters or BFFs
    • Gifts by Price
      • Under 30€ / $30
      • 31€ - 50€
      • 51€ - 80€
      • Bundle & Save +10%
    • Gift Cards & Stocking Stuffers
      • Shop Gift Cards
      • Shop Stocking Stuffers
  • About Us
    • About Us
    • Meet the Team
    • Unwind for Business
    • Say Hello!
  • For Beginners
    • 🪡 Beginner's Guide
    • What's in a Needlepoint Kit?
    • How to Choose a Project
    • Best Stitches for Beginners
    • Guide to Affordable Needlepoint
    • Download our Free How To Booklet
  • Stitch Guides & Tutorials
    • Free Stitch Guides
    • Stitch Library & Tutorials
    • Tips & Tricks
      • Tips to Select Decorative Stitches
      • How to Compensate Stitches
      • Best tips for a perfect Stitching
      • Tips for a perfect Basketweave stitch
  • Needlepoint Finishing
    • ✂️ DIY Finishing Guide
    • Popular Finishing Tutorials
      • How to Block a Canvas
      • How to Frame a Needlepoint
      • How to Finish an Ornament
      • How to finish a Sunglasses Case
      • See all Finishing Tutorials
    • Tips & Tricks
      • How to do a Binding Stitch
      • Sewing 101 for Needlepoint
      • Top Tips to create a Gallery Wall
      • Unique Framing Ideas
      • DIY Finishing FAQs
  • Our Project Gallery
  • Blog
  • Get 10% OFF
    Take our Quiz
    Rewards
    Blog
    FAQs
    Log in
  • instagram Instagram
  • Facebook
  • YouTube
  • Pinterest
  • TikTok
Cart
Subtotal
€0,00
Shipping, taxes, and discount codes calculated at checkout.
View cart
Your cart is currently empty.
  • Get 10% OFF
  • Take our Quiz
  • Rewards
  • Blog
  • FAQs

Language

  • Français
  • English
icon-search Search
Unwind Studio logo on a white background Unwind Studio logo on a white background
account Log in icon-search Search Cart
  • Needlepoint Kits
    Featured
    New
    Bestsellers
    Starter Kits (all tools inc)
    Beginners
    Kids
    Digital Charts
    25% Off Sale
    Bundle & Save 10%
    Kits with Stitch Guide
    Kits with Finishing Materials
    Tools & Supplies
    All Kits & Canvases
    Shop by Category
    All Kits & Canvases
    Starter Kits
    Bookmarks
    Key Fobs
    Bag Charms & Patches
    Portuguese Tiles
    Sunglasses Cases
    Coasters & Trays
    Clutches & Inserts
    Cushion Kits
    Ornaments
    Christmas Products
    Long Stitch Kits
    Magnets
    Kids
    Shop by Style
    Summer Love
    Floral Garden
    Bold and Colorful
    Nature Elements
    Folk Art
    Geometric Designs
    Abstract Visuals
    Minimal Aesthetic
    Colorful Spring
    Mental Health Crafts
    Shop by Skill Level & Size
    for Kids
    Starter Kits (all tools inc)
    Beginner
    Confident Beginner
    Intermediate
    Advanced
    Extra Small
    Small
    Medium
    Large
    Shop All Kits
    ARE YOU INTO?
    Canvas Sets
    Animals
    Flowers
    Landscapes
    Tumbling Blocks
    Museum Art
    Sayings
    Food
    Portugal
    Travel
    Christmas
    Nursery & Kids Decor
  • For Beginners
    Needlepoint Beginner's Guide
    Beginner's Guide
    How to Needlepoint
    Shop
    Starter Kits (all tools inc)
    Beginners Kits
    Start with the Basics
    What's in a Needlepoint Kit?
    How to choose the right project
    Best Stitches for Beginners
    Best Tips for Beginners
    Guide to Affordable Needlepoint
    Download our Free Booklet
  • Accessories
    Stitching Tools
    Stitching Tools
    Shop All
    Decorative Stitches Booklet
    Project Bags
    Needle Minders
    Embroidery Scissors
    Blank Canvas
    Framing by Unwind Studio
    Framing
    Shop our Frames
    All about our High-Quality Frames
    Acrylic Trays & Coasters by Unwind Studio
    Acrylics
    Shop our Acrylics
    Shop Kits & Canvases Inserts
    Lifestyle
    Lifestyle Items
    Shop our Lifestyle Items
    Greeting Cards & Gift Tags
    Aromatic Candles
    Organic Infusions
  • Finishing
    Learn how to Finish
    Explore our Guide
    How to Block Needlepoint
    How to Frame Needlepoint
    See all Finishing Tutorials
    Finishing Supplies
    Shop by Project
    Shop all Supplies
    Tips & Tricks
    How to do the Binding Stitch
    Sewing 101 for Needlepoint
    Tips for Gallery Walls with Needlepoint
    Top Finishing FAQs
    Project Gallery
  • Stitches Guides & Library
    Stitch Guides
    Stitch Library & Tutorials
    Tips & Tricks
    Tips to Select Stitches
    How to Compensate Stitches
    Best Tips for a Smother Stitching
    How to get a perfect Basketweave Stitch
    Decorative Stitches for Needlepoint Booklet
    Decorative Stitches
    Shop our Booklet
  • Gifts
    Gift by Recipient
    Browse our Gift Guide
    Gifts for Beginners
    Gifts for Crafters & Makers
    Gifts for Teenagers
    Gifts for Sisters or BFFs
    Gifts for Kids
    Gifts by Price
    Under 30€ / $30
    31€ - 50€
    51€ - 80€
    Over 80€
    Bundle & Save +10%
    Unwind Studio Gift Box
    Gift Boxes
    See our Gift Boxes
    Greeting Cards & Gift Tags
    Unwind Studio Gift Card
    Gift Cards
    Shop Gift Cards
    Shop Stocking Stuffers
  • About
    About Us
    About Us
    More about Our Story & the Team
    Unwind Rewards
    Unwind Rewards
    Earn while Unwinding
    Our Blog
    Learn and Get Inspired
    Unwind for Business
    Unwind for Business
    Become our Stockist
    Custom Orders
    Special Events & Corporate Gifs
    Our Artists
    Become an Affiliate
    Take our Quiz
    Say Hello!
Access Denied
IMPORTANT! If you’re a store owner, please make sure you have Customer accounts enabled in your Store Admin, as you have customer based locks set up with EasyLockdown app. Enable Customer Accounts
Home / Unwind Studio Blog /
Oct 11, 2024

How to professionally frame your needlepoint with Unwind Studio Frames: Video & How To

by Cristina Cerqueira

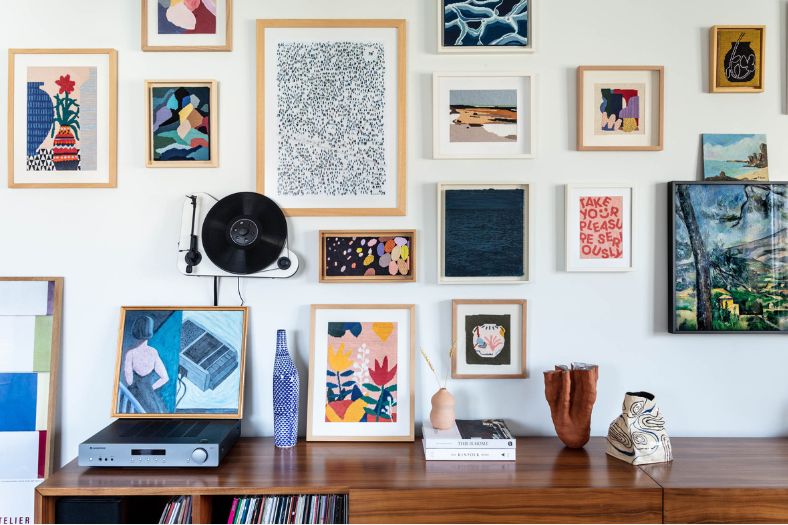
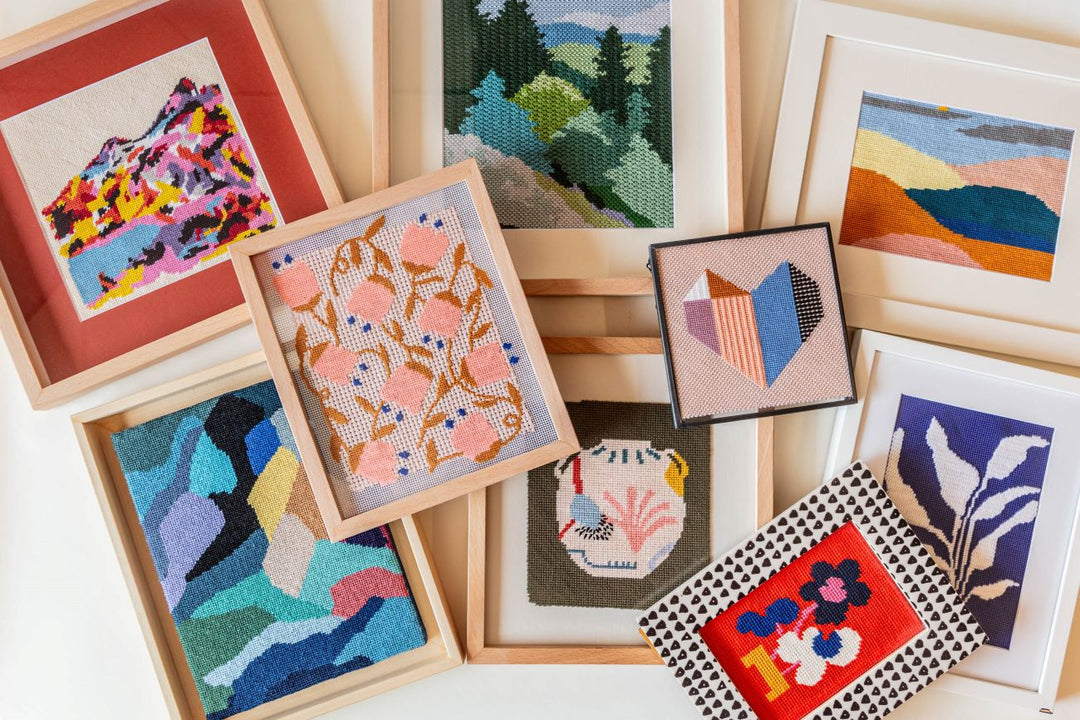
Framing your needlepoint artwork not only enhances its presentation but also preserves it for years to come. Using our Unwind Studio Frames, designed specifically for needlepoint (although you can use it for anything you want!), you can achieve a professional finish that showcases your hard work and intricate stitching.

In this detailed tutorial, we’ll guide you through each step of framing your needlepoint, ensuring it’s perfectly aligned and securely mounted.


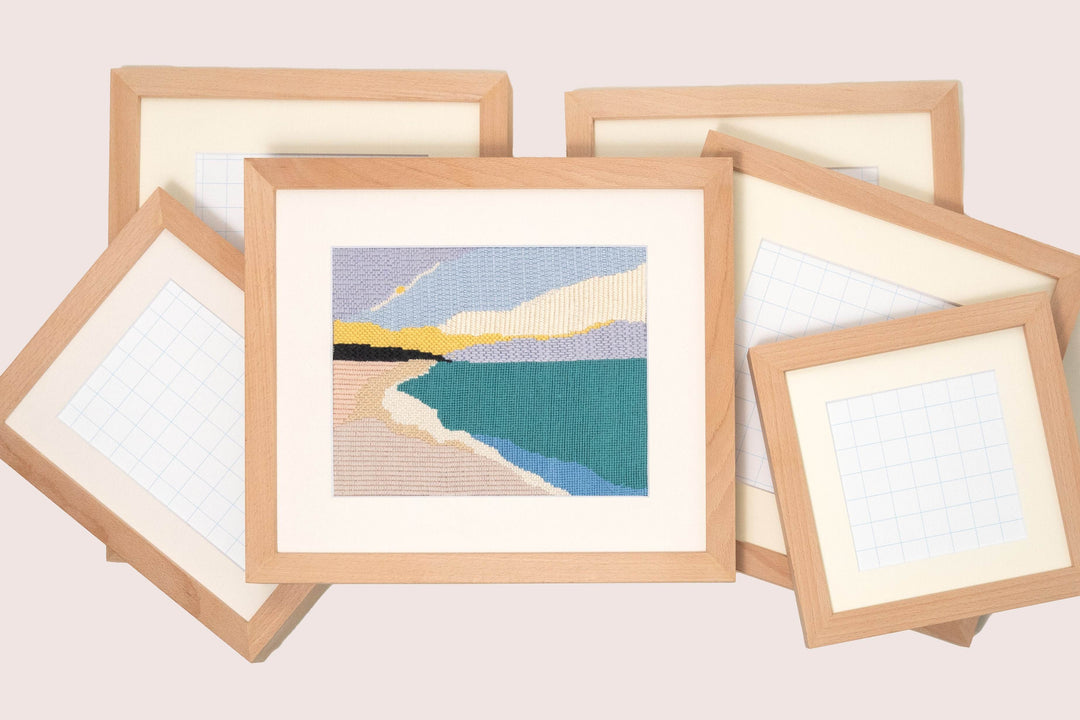
A quick intro to our Needlepoint Frames

Made with the highest quality materials: solid wood moulding, acid-free matboard and self-adhesive foam board, at an affordable price when compared with custom framing solutions. All the details about our frames can be found here.

We also included a mounting kit in every frame purchased, with all the best tools to finalize your project (complete components listed below), considering the best methods used by the framing professionals.

For example, we avoid using MDF for the back, opting for the foam board + special framing tape solution, as this is the recommended method to keep your piece isolated from dust and moisture. 

How to Frame your Needlepoint with Unwind Studio Frames: Video Tutorial: 


Materials You'll Need:

  • Unwind Studio Frame 
  • Stitched Needlepoint Canvas (or any artwork you wish to frame)
  • Mounting Kit (included with the frame):
    - hanging hardware (you have two different types to choose from!)
    - Special framing paper tape to seal & protect the back of the frame 
    - Silicone bumper pads to protect the wall and balance the frame
    - Hemline pins to secure the canvas to the foam board
    - Self-adhesive foam board (acid-free backing to keep artwork smooth and supported)
  • Scissors
  • X-Acto Knife
  • Pencil
  • Bowl with water
  • Small sponge or cloth
  • Hammer
  • Ruler

Step-by-Step Instructions:

1. Prepare the Frame

Begin by carefully disassembling your Unwind Studio Frame. You’ll find the foam board, mat board, and the wooden frame itself. 

2. Trim the Excess Canvas

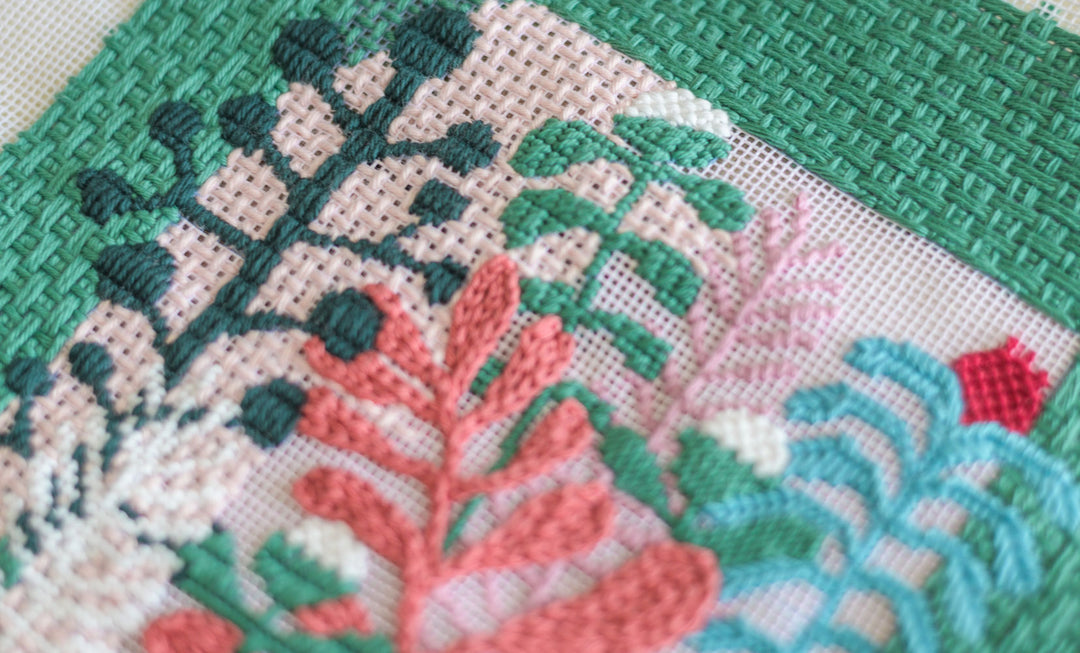
If your stitched needlepoint canvas has extra fabric around the edges (cotton bias tape, for example, if you're using one of our canvases), use scissors to carefully cut it away. This will reduce bulk and ensure a clean, smooth finish inside the frame.

3. Align the Canvas

Place the mat board on top of the foam board (with the grid side of the foam board facing up). Using a pencil, mark small dots at each internal corner of the mat board—this will serve as a guide for centering your needlepoint. Remove the mat board and position your stitched canvas on the foam board, aligning the corners of your canvas with the dots you just marked.

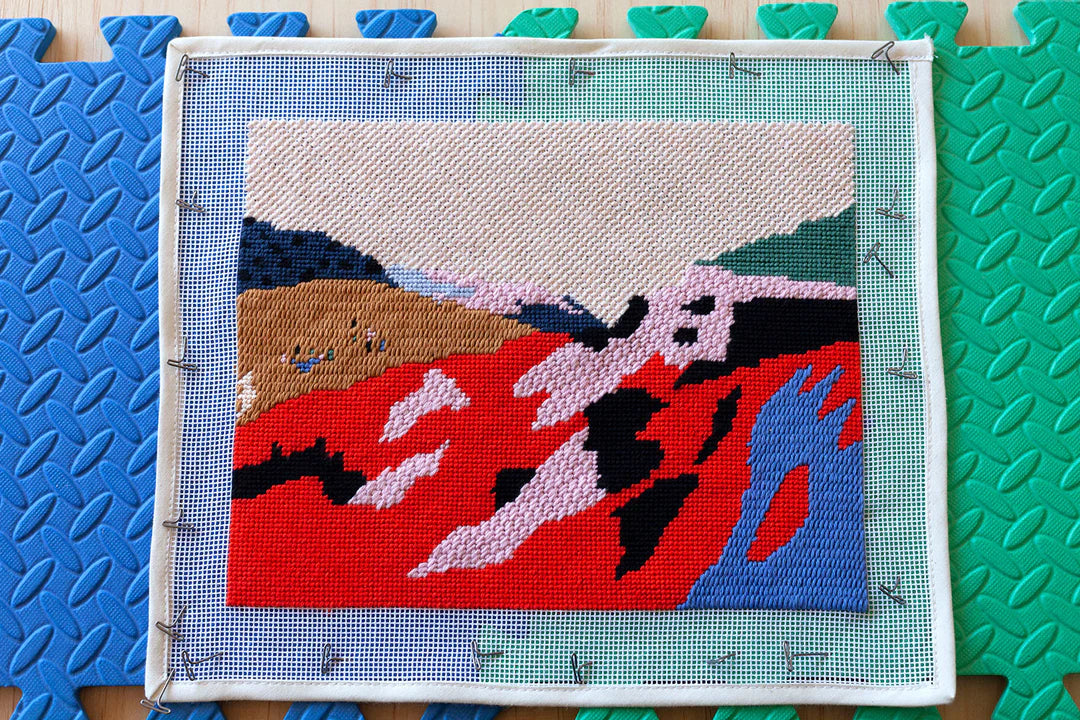
4. Secure the Canvas

Once the canvas is properly aligned, use the metal pins provided in the mounting kit to secure it to the foam board. Start by pinning the four corners, making sure the canvas remains taut and even. Then, add additional pins along the sides to ensure it’s fully secured.

Tip: Use the flat side of your scissors to press the pins into the foam board—this can prevent sore fingers from applying too much pressure.

5. Layer the Boards and Frame

After securing the canvas, place the mat board back on top of the foam board. This mat will not only protect your artwork but also add a polished border. Now, slide both the foam board (with the canvas) and the mat board into the frame, ensuring everything fits snugly. Before closing the back, check to ensure no excess canvas is visible around the edges.

6. Seal the Back of the Frame

This next step is crucial for giving your needlepoint a clean, finished look and protecting it from dust, moisture, and other potential damage. Measure the length of each side of your frame and cut the provided sealing tape to size. Lightly moisten a sponge or cloth with water and dampen the shiny side of the tape. This activates the adhesive. Attach the tape along the back edges of the frame, ensuring it’s flush with the wood. Use an X-Acto knife to make small cuts at the corners, allowing you to fold the tape inwards for a neat finish. Repeat this for all four sides, overlapping at the corners.

7. Attach the Hanging Hardware

With the framing complete, it’s time to attach the hardware for hanging. Consider the orientation of your canvas—whether it’s landscape or portrait—before selecting the top side for your hanger. Use a ruler to find the center point along the top edge of the frame. Place the hanger here - if you choose the smaller one, the triangle should always be pointing down, so that it remains "invisible" on the wall when you hang it - and secure it with the small nails provided in the mounting kit. A hammer will help you gently tap the nails into place, ensuring the hanger is firmly attached - use it carefully.

8. Add Silicone Bumpers

To protect the back of your framed piece from scratching the wall or sitting unevenly, apply small silicone bumpers (available in the mounting kit). These transparent, adhesive dots can be attached to the four corners of the back of your frame. Simply peel off the backing and press each bumper in place. This will ensure the frame hangs evenly and reduces any impact against the wall.

FINAL RESULT OF THE BACK OF THE FRAME:


Conclusion:

Congratulations! You’ve successfully framed your needlepoint using an Unwind Studio Frame, giving your artwork a professional presentation while protecting it for the long term. By following these steps, your needlepoint is now ready to hang, bringing a touch of creativity and craftsmanship to your walls.

Framing your own work not only adds a personal touch but also allows you to control every detail of how your needlepoint is displayed. With the Unwind Studio Frames, you have everything you need for a polished, gallery-worthy finish. Enjoy the satisfaction of showcasing your art, knowing you’ve done it all yourself!

Happy Framing!


icon-left-arrow Back to Unwind Studio Blog
FRAMING SHOP

THE BEST NEEDLEPOINT FRAMES

Shop our beautiful & unique frames - made by the best materials, at an affordable price!

Shop Now

Articles you might like

Unique Framing ideas for Needlepoint

Are you looking for a inspiration on how to frame your needlepoint? Take a look at our framing inspiration guide!

read our blogpost

Video Tutorial: professional Framing at home

Learn how to frame your needlepoint (or any other art project) with our Unwind Studio frames!

read our blogpost

All about our Unwind Studio Frames

Learn all about our Frames and why they are the best of best!

Read now
How to block my needlepoint canvas

How to block needlepoint canvas: Video & How To

Want to learn how to block your needlepoint projects? Follow these simple steps and you can practice your needlepoint blocking techniques in the comfort of your own home!

read our blogpost

Make the most of your creative time

aesthetic needlepoint design in earthy colors

How to needlepoint

Everything you need to know about this creative & meditative craft!

Learn with us

Stitch Guides & Gallery

List of all the stitches used in amazing needlepoint projects created by you!

Get inspired

Needlepoint Finishing

Learn all the finishing techniques to transform your needlepoint canvas into your dream project!

Explore DIY finishing
Invalid password
Enter
Unwind Studio logo with design

Unwind and Save

Get a 10% discount when you subscribe to receive special offers, updates on new product launches, needlepoint inspiration, and more.

  • instagram Instagram
  • Facebook
  • YouTube
  • Pinterest
  • TikTok

Shop & Resources

  • Shop All Needlepoint Kits
  • Tutorials
  • Blog
  • Take our Quiz
  • Unwind Rewards
  • Refer a Friend
  • Become an Affiliate
  • FAQs

Info

  • Contact Us
  • Track my Order
  • Imprint
  • Shipping & Returns
  • About Us
  • Our Artists
  • Accessibility
  • Store Locator
  • Wholesale
  • Unwind for Business
  • Work With Us

Language

  • Français
  • English
  • American Express
  • Apple Pay
  • Google Pay
  • Maestro
  • Mastercard
  • PayPal
  • Shop Pay
  • Union Pay
  • Visa

© 2025 Unwind Studio | Terms | Privacy Site by Aeolidia

How to professionally frame your needlepoint with Unwind Studio Frames