How to frame a needlepoint canvas with frames from Unwind Studio, IKEA, Target, Michaels, etc
Needlepoint framing is a way to finish your needlepoint pieces, that results in a put together and modern looking wall hanging. It consists in the mounting of a canvas in a frame, and it can be made in many different ways, depending on the type of frame you use, and mounting technique.
There are professional needlepoint finishing and mounting services (usually expensive because they require customization), but in this blog post we want to show you how easy it is to frame your needlepoint at home, in an affordable and simple way!
You can easily find frames in places like IKEA, Target, Michaels craft stores, or shop our professional & high-quality DIY needlepoint framing solutions.
We'll show you 3 different ways to do a DIY needlepoint framing, accompanied by video tutorials, so you can choose the one that fits your style better.
- Method 1: Deep-Set framing using a frame from IKEA
- Method 2: Floating framing using a frame from IKEA
- Method 3: DIY Professional framing using our Unwind Studio frames
We'll also cover the topics below, that are very important to consider when you are starting your needlepoint framing journey:
- How to protect your framed needlepoint
- Using glass: our tips & tricks
- How to get a mat with your project dimensions
- Key takeaways for needlepoint framing
- Inspiration for unique needlepoint framing ideas
First step for Needlepoint Finishing: How to Block your canvas
Before you start framing your needlepoint finished canvas, you need to ensure that is has been properly blocked. This step is very important, to remove any distortion or tension that may cause the canvas to warp, so all the edges are neat and straight inside the frame. Read our blog post on How to Block Needlepoint if you need instructions for this first step of the finishing process.
Our DIY needlepoint framing suggested methods
The 3 most common methods used for general needlework framing are gluing, pinning or lacing.
We recommend avoiding using glue, as this limits the possibility of in the future, finishing your stitched canvas for a different purpose. Below we'll describe two different approaches on how to finish your project with a pin method, which is our preferred method!
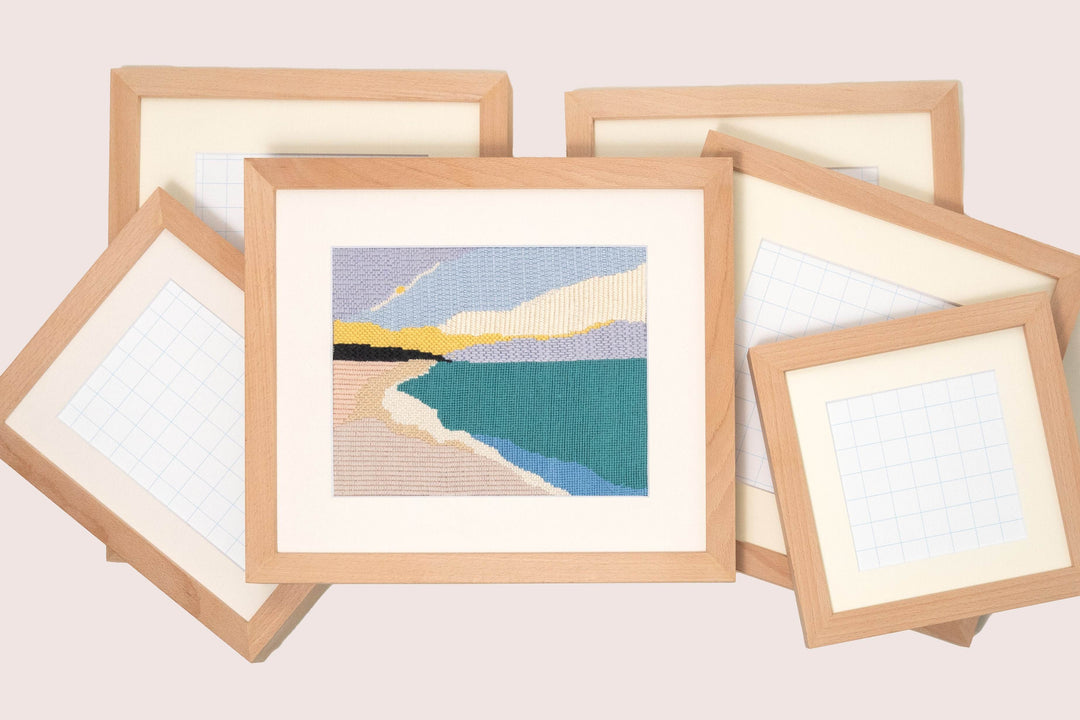
Method 1: Deep-Set framing using a frame from IKEA
The first approach uses a deep-set frame bought in IKEA. The needlepoint canvas is secured/pinned to a foam board the size of the frame you have selected. The stitched piece is then covered by a mat that hides the unstitched area and creates an artistic look for the piece to stand out.
Tools needed:
- Finished needlepoint canvas (blocked beforehand)
- Foam board (we used 3mm thickness k-line foam board. The foam board should be the size of the frame)
- Frame of your choice
- Mat with the desired dimensions (see below more details)
- Hemline/dressmaker pins (these shouldn't have a large top, so that they can be easily concealed into the foam board, and must be stainless steel to avoid rust)
- Scissors (or something hard to help push the pins in)
- Rulers or a square
- Paper tape.
DIY Needlepoint Framing using Deep-Set frame from IKEA - Video Tutorial:
DIY Needlepoint Framing using Deep-Set frame from IKEA - Instructions:
1. Center the canvas
- Center the canvas onto the foam board, aligning it with the mat, so only the stitched part is visible.
- The mat should be cut so the inner opening matches the size of the design.
- Be careful to not leave any of the blank canvas showing.
- Once it's centered, check with the ruler or square to make sure the sides are even.
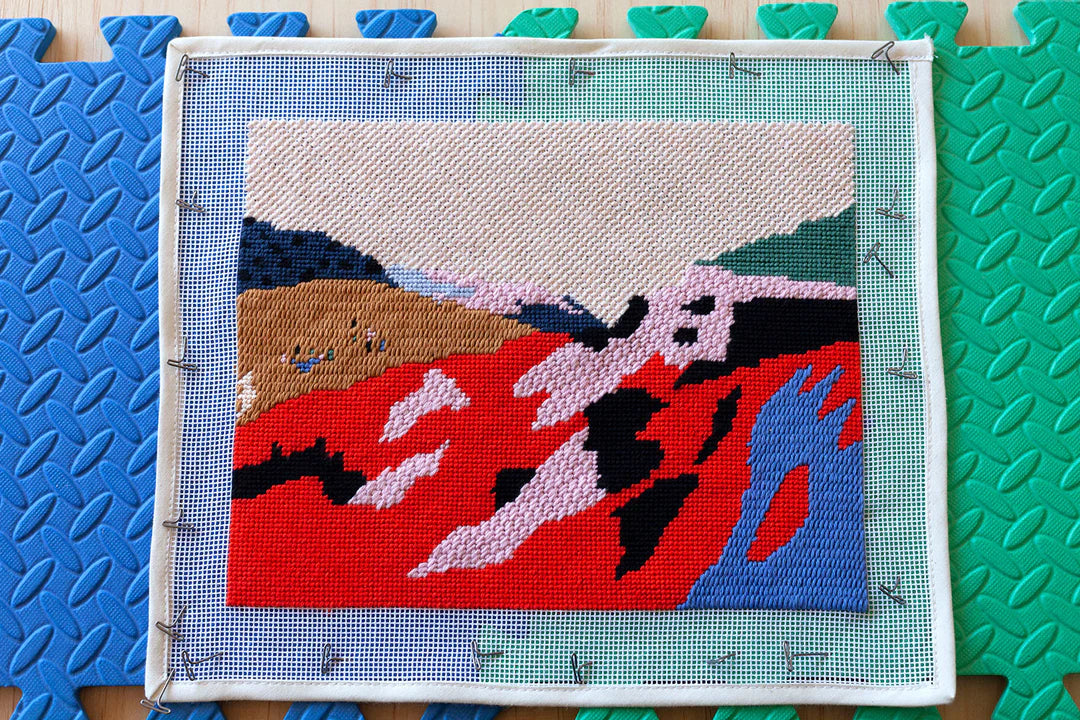
2. Pin the canvas
- Secure the canvas onto the foam board using metal pins, making sure to not let the pins go through to the opposite side (this is why the thickness of the foam board material is important).
- Pin all 4 sides.
3. Secure the pins in the back
- Some pins might have poked through the back.
- If this is the case cover them with tape, so you can safely handle the canvas.
4. Place the mat and the canvas in the frame
- Place the mat and the canvas (plus foam board) inside the frame and press them with the frame backing.
- Check to see if everything is aligned inside the frame, and finally, close it with the metal clasps.
Method 2: Floating framing using a frame from IKEA
The second approach uses a floating method applied also in a IKEA frame, which means the piece of needlepoint is mounted around a foam board the size of the stitched part. This piece is then attached to a back mat that serves as the background, giving the appearance that the needlepoint board is "floating".
Tools needed
Same tools used in Method 1 above, plus these extra tools, specific for the Floating Frame method:
- 3mm or thicker (if you want to enhance the floating effect) k-line foam board
- Back mat (a piece of cardboard the size of the frame to act as a background to the needlepoint piece)
- Sewing clips
- Double sided tape
- Pencil.
DIY Floating Frame from IKEA for Needlepoint - Video Tutorial:
DIY Floating Frame from IKEA for Needlepoint - Instructions:
1. Prepare the canvas: cut off the cotton bias tape and the corners, so that the borders can be folded neatly.
2. Secure the foam board
- Cut the foam board to the size of your stitched piece (it should be a bit smaller than the actual size of the needlepoint, so that when the edges are folded no blank canvas is showing).
- Secure them in place with sewing clips.
3. Pin down the 4 sides
- Use the dressmaker pins to pin down the 4 edges.
- With a hard object, press the pins down into the board, so that the heads are concealed, but not too deep that it causes unwanted texture.
4. Remove the clips and tape down the canvas
- Remove the sewing clips and smooth down the canvas.
- Turn over the board and tape down the excess blank canvas using paper tape.
5. Mark the center on the back mat
- Check the alignment with the square and mark the corners using a pencil, so that you can correctly place the needlepoint piece.
6. Stick the needlepoint to the back mat
- Place some double sided tape on the back of the needlepoint piece and stick it to the back mat.
- Use the pencil marks to check that it's centered.
- Check with the square to see if the piece is set straight.
- Erase the pencil marks.
7. Place the needlepoint in the frame
- Place the needlepoint piece inside the frame and press them with the frame board.
- Close the frame with the metal clasps.
Method 3: Gallery framing using our Unwind Studio frames
- Read the full article on how to professionally frame your needlepoint with Unwind Studio Frames, and check out the Framing Collection to choose the best one for your projects!

How to protect your framed needlepoint
After you framed your needlepoint, there are a few things to have in mind when it comes to protecting it. The glass is a great way to protect your piece from dirt and dust, and other oils and residues that may come in contact with the piece, but you should also keep your frames clean so as to avoid any particles going in through the backing.
If you go for a glassless frame, you have to dust it or dabb it with a damp cloth to keep the dust from collecting on top of the needlework, and avoid having it in places that may be susceptible to staining, like smoke or oils from cooking.
With or without glass, you should also avoid direct sunlight, as it will prevent sweating (because of accumulated moisture) and fading of the thread colors of your piece over time. You also shouldn't keep the framed needlepoint in a humid room, because the constant exposure to moisture may cause unwanted warping and distortion.
Using glass to protect needlepoint: our tips & tricks
Using glass in your needlepoint frame is a personal choice, that depends on the finishing style you want to give your piece, as well as your budget.
If you want to use glass, the one with best quality is Museum glass, because of its particular reflection control properties, as well as being clearer than other glasses (it's very hard to tell that you are using glass!). However, bear in mind that this glass is very expensive.
If you decide to use a more affordable glass, avoid using one without UV protection, and never place your frame in direct sunlight, as explained above.
How to get a mat with your project dimensions
In our opinion, the trickiest aspect of DIY needlepoint framing is finding the perfect size mat for your piece. Most times, the mat that comes with the frame doesn't align correctly with the dimensions of the stitched piece, which is necessary to avoid showing the blank canvas, or covering too much the stitched area.
Here are some options for creating your own framing mats:
- Have a custom mat made in a professional framing store near you;
- Order a custom mat online: there are some online framing services that provide these accessories;
- Cut your own mat at home. You can easily cut a simple looking mat, using tools that you probably already have, or even a mat with beveled edges using a mat cutting tool, like this Logan Mat Cutter.
Key takeaways for needlepoint framing
- Your needlepoint piece has to be blocked beforehand. Read our How to block your needlepoint blog post to learn more about this.
- Choose a type of frame that fits your needlepoint dimensions and style
- Decide for the framing method that will suit you best (glue, pin or lace)
- Buy or create a mat with the right dimensions
- Glass or glassless, decide what fits best for you
- Take into consideration the place you will hang your frame, to ensure a proper protection of your beautiful piece.
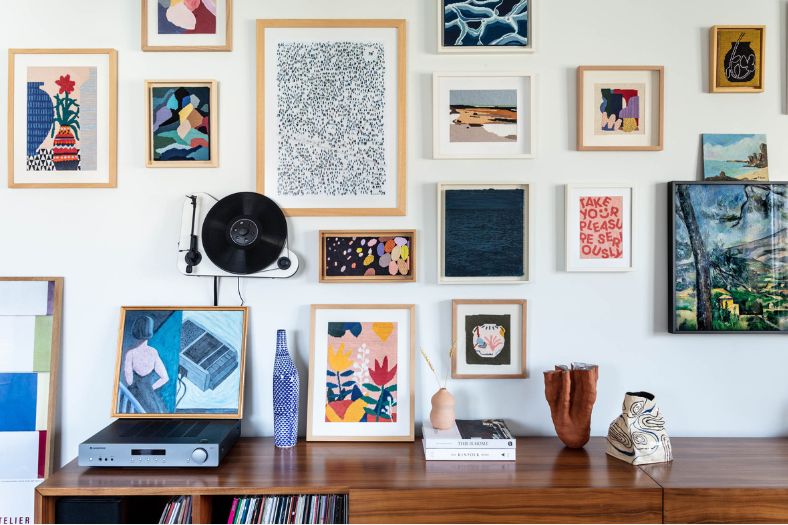
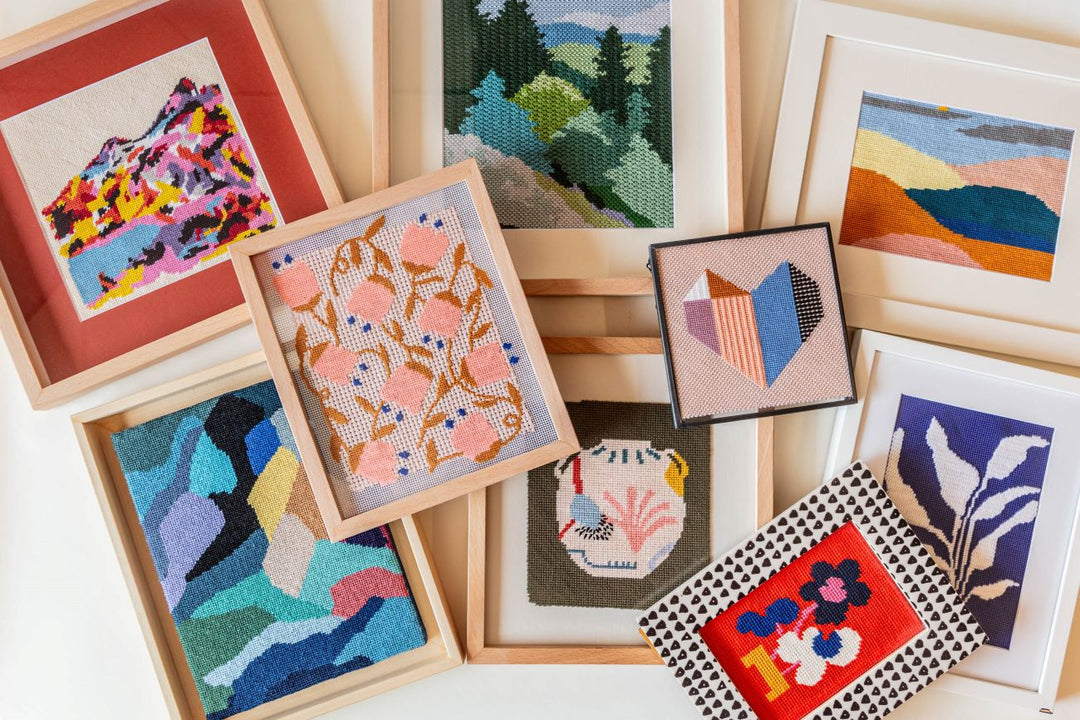
Unique needlepoint framing ideas
In this blog post we show you a variety of framing ideas that you can select for your finished needlepoint. Depending on the size and look you want, you will find for sure inspiration for your beautiful project!
Now it's your turn!
Now that you know how to frame your needlepoint pieces, what are you waiting for? Go give a new life to your walls and decorate them with your favorite needlepoint designs!
If you found this tutorial helpful, share the results with us via email at hello@unwind.studio.
If you send us a photo of your Unwind Creations you can receive 50 Unwind reward points, that you can later redeem into discounts through our Loyalty Program!
Happy Stitching!