Tent Stitch - Basketweave, Continental and Half-Cross
Mastering the Needlepoint Tent Stitch: Basketweave, Continental & Half-Cross by Unwind Studio
-
Best for: Beginners and advanced stitchers seeking the most versatile and foundational needlepoint stitch for backgrounds and detailed work.
-
Technique: Comparing the three variations of the Tent Stitch - Basketweave, Continental, and Half-Cross- to determine the best coverage and durability for your project.
-
Key Tip: Choose Basketweave for functional items (like belts or cushions) to prevent canvas distortion, and use Continental for small, isolated areas where diagonal rows aren't possible.
-
Mindfulness Note: The rhythmic, repetitive nature of the Tent Stitch is the fastest way to enter a flow state, allowing your mind to rest while your hands create a durable, handmade fabric.
Tent Stitch 101: Comparing Basketweave, Continental, and Half-Cross
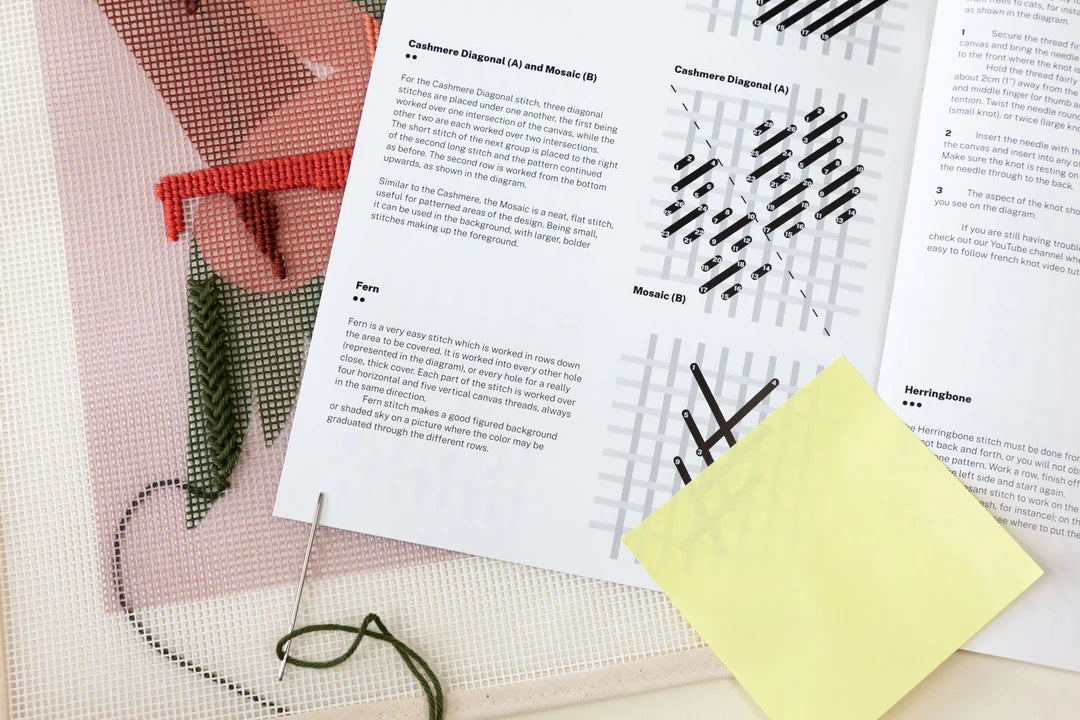
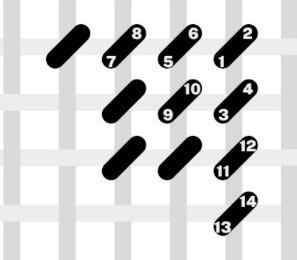
The Tent Stitch is the simplest and most common stitch in needlepoint, and it is the foundation for many other stitches. It is worked as small diagonals, across a single intersection of the canvas.
Understanding Tent Stitch Variations: Coverage, Distortion, and Thread Usage
- Stitch Structure: Flat, Parallel, Diagonal
- Recommended for: Small areas, Background
- Can be worked in 3 different ways, each with its own name: Basketweave, Continental, and Half-cross.
- Each variation provides different levels of coverage and structure, and can be chosen taking into consideration the type of wear or finished product, the amount of thread one wants to use, and how much distortion of the canvas we want to avoid. See the table below for more details:
| Stitch Variations | Coverage | Canvas Distortion | Thread Usage |
| Basketweave | Strongest | Very Low | High |
| Continental | Medium | Medium | Medium |
| Half Cross | Weakest | Low | Low |
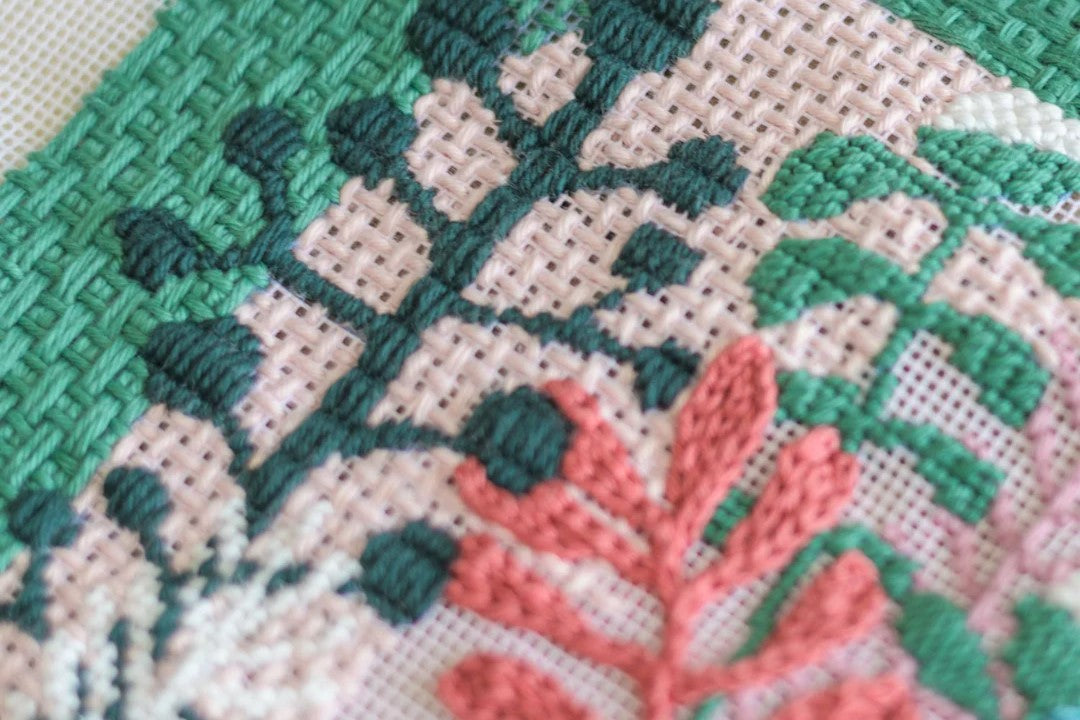
The Basketweave Stitch: The Gold Standard for Durability
Stitch details:
- Basketweave stitches are worked up and down diagonals, and the back of the canvas it will result in a woven or basket-like pattern
- It's the tent version that has the minimal distortion of the canvas
- Recommended stitch for products that might wear a lot, like belts.
- The stitching may look uneven if you work two consecutive rows in the same direction.
Basketweave Stitch Diagram
Basketweave Stitch Video Tutorial
How to achieve a perfect Basketweave Stitch
In this blog post we explain all the tips and tricks to take into consideration to obtain a perfect basketweave stitch! If you are a perfectionist, then this post is for you!
The Continental Stitch: Ideal for Small Areas and Beginners
Stitch details:
- Ideal for stitchers who are learning how to needlepoint.
- A good mnemonic is that when you are working from left to right along the row, the actual stitch is worked from right to left and vice versa.
- The oblique lines on the back of the canvas provide a strong stitch with good coverage.
- Tend to distort the canvas more than basketweave but it can be solved by blocking your needlepoint canvas.
Continental Stitch Diagram

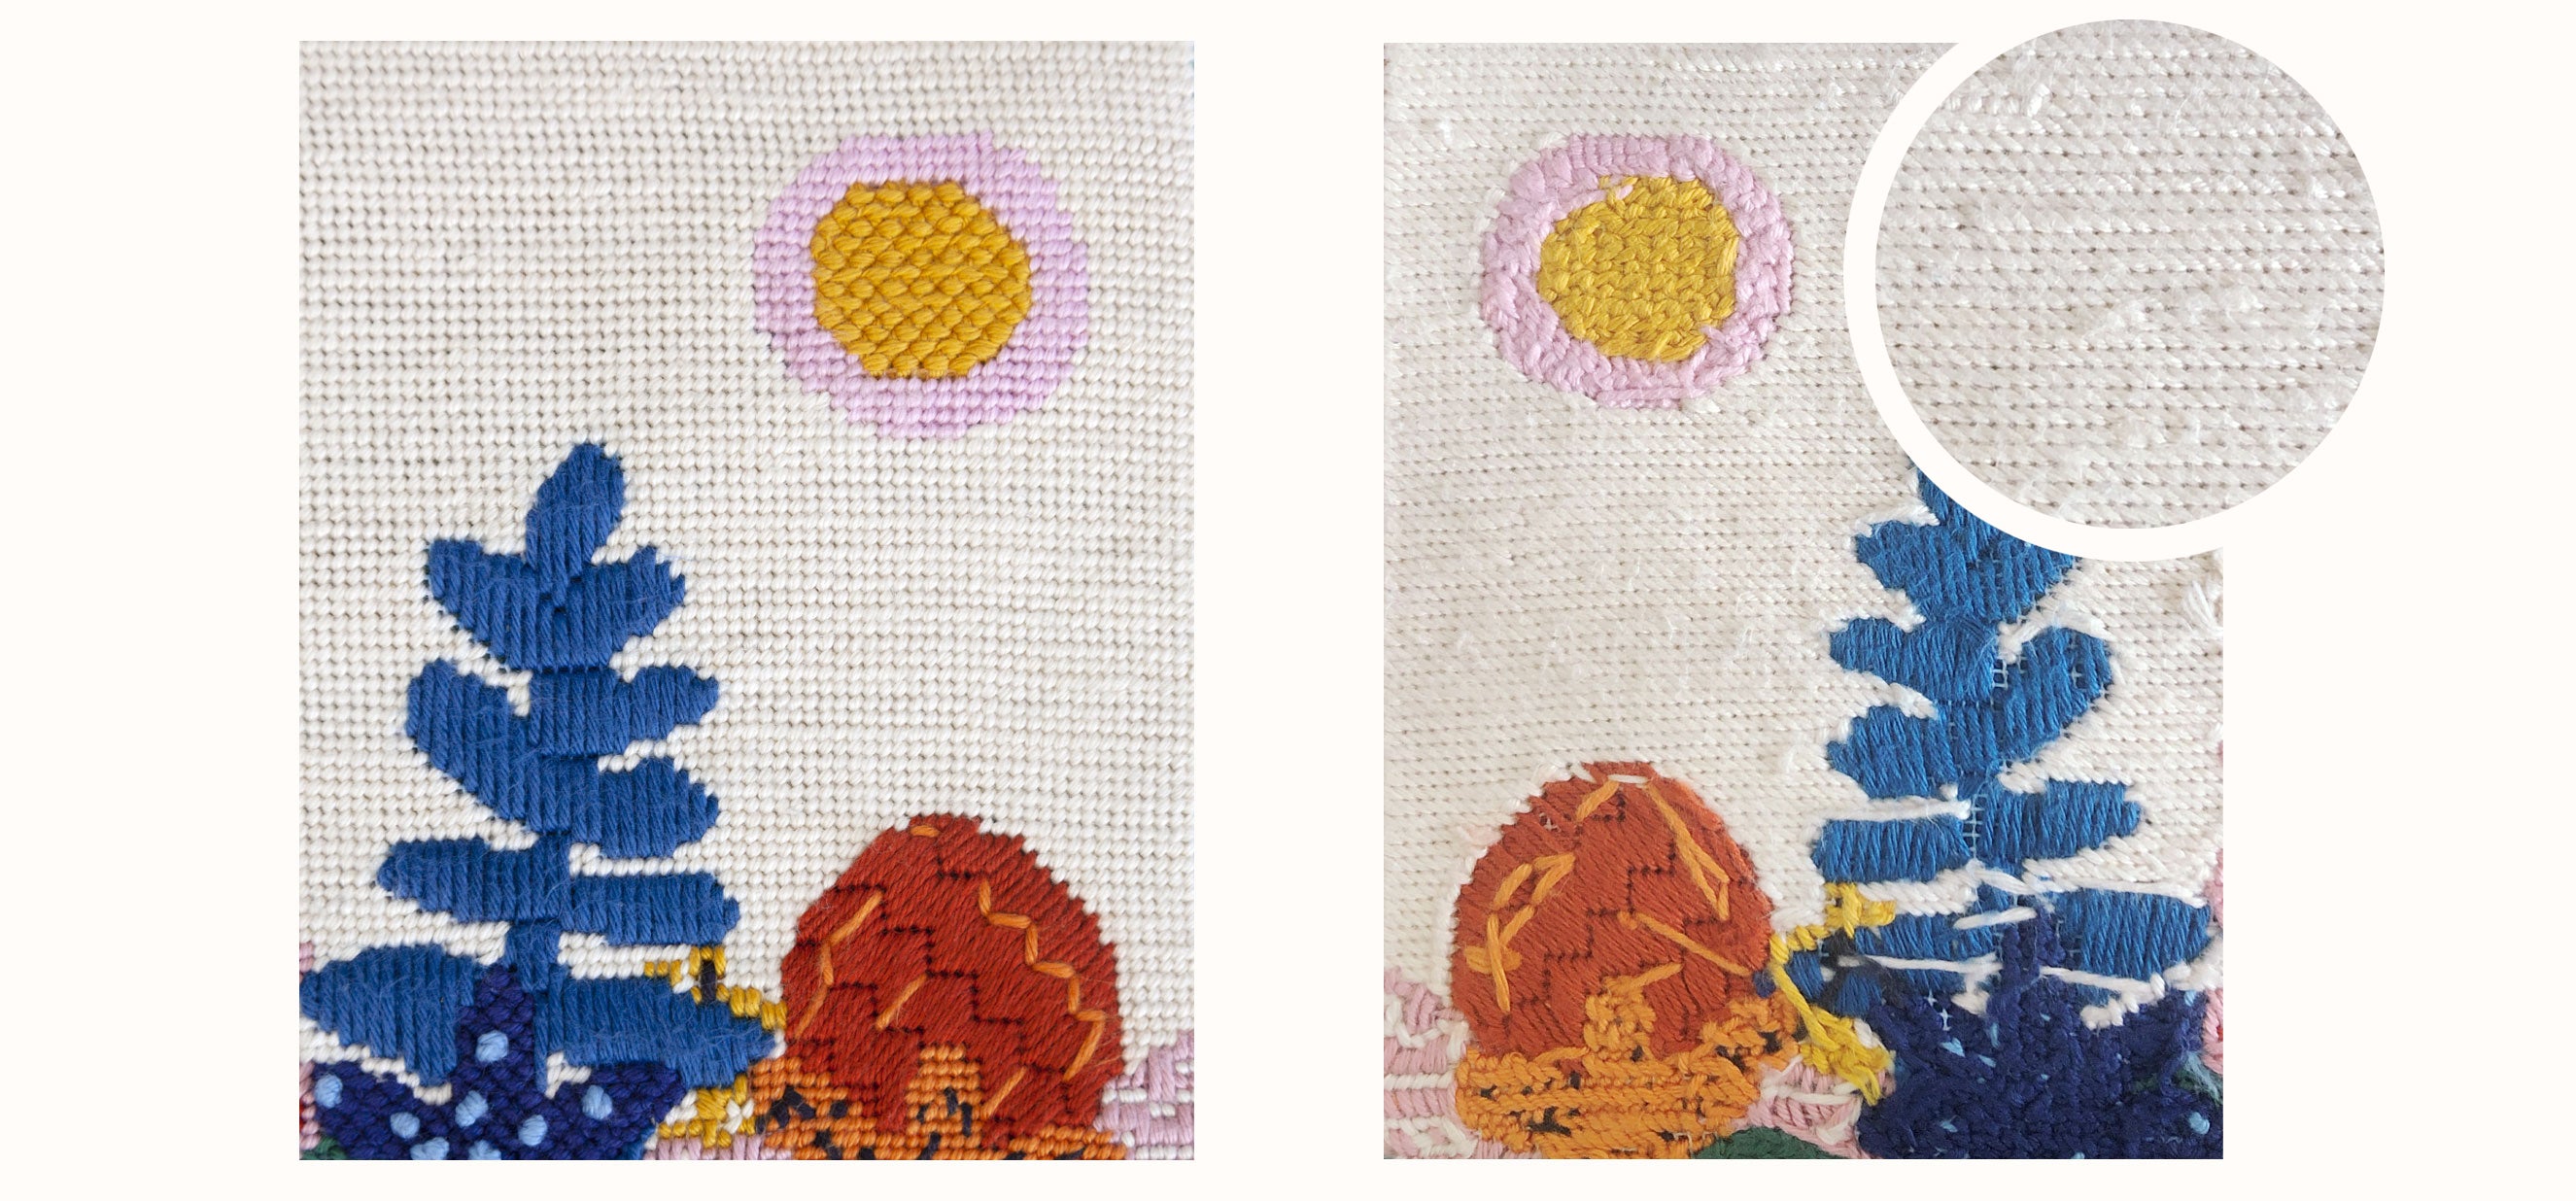
Front and back side of the Continental Tent Stitch, in the "Garden of Joy" Needlepoint Kit
Half-Cross Stitch: When to Save Thread (and When to Avoid It)
Stitch details
- Looks almost identical to continental tent stitch on the front of the canvas, but on the back is very different, with only small upright threads instead of a dense covering of diagonal stitchery
- It is not such a strong stitch and is not recommended for any project that will need to wear well, such as a purse or stool top
- Does not distort the canvas as continental tent stitch does, and uses less thread
Half Cross Stitch Diagram


Continental Stitch and Half-Cross Stitch Video Tutorial
Advanced Variations: Exploring Skipped Tent and T-Stitches
Two variations of the Tent Stitch are the Skipped Tent and the T Stitch. These stitches are perfect for a situation where a light stitch is preferable for the background, especially if it is a big area to cover.

Now that you know everything about the Tent Stitch, it's time to practice it on your favorite needlepoint project!
Happy Stitching :)